Are you an adventure-seeker, looking to climb to the highest point of Antarctica?
This trip is a bucket-list-ticker if ever there was one, especially if you’re one of the ambitious few who are tackling the world’s Seven Summits, of which Mount Vinson is one.
Although not the most technically challenging, climbing Mount Vinson depends largely on the weather on the day and the logistics of planning the trip.
Below is a detailed, comprehensive guide which provides hikers with useful information about the typical route and itinerary you can expect. We also give you tips on the best way to prepare for your hike, the best time for your trip and the equipment you will need to buy and pack.
Mount Vinson Overview
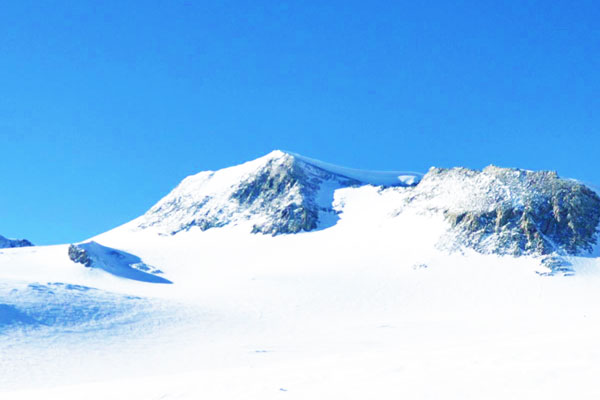
Mount Vinson is situated in the Sentinel Range of the Ellsworth Mountains, deep in the heart of Antarctica.
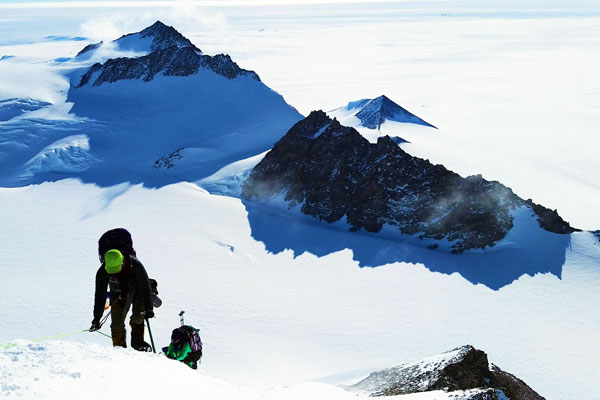
The summit rises to an impressive 4,892m above sea level. You will see vistas of vast glaciers and snow-covered mountains gently blurring with the white skyline in all directions.
Mount Vinson was first summited in 1966 but did not become logistically accessible to the average climber until relatively recently.
Although a handful of individuals have summited the mountain from East Face and another route, the “standard route” really the only advisable way to the top.
Mount Vinson Typical Itinerary
There is really only one way to the summit of Mount Vinson. Below is the typical itinerary of the climb.
To give you a better idea of what lies ahead, this itinerary starts with the journey to the mountain from your home country, as so much of the challenge is simply getting there.
Day 0-1: Arriving in Punta Arenas, Chile
Day 2: Preparation for Departure
Day 3: Flight to Antarctica
Day 4: Vinson Base Camp
Day 5: Vinson Base Camp Acclimatisation
Day 6: Base Camp to Low Camp
Day 7: Low Camp Acclimatisation
Day 8: Low Camp to High Camp
Day 9: High Camp Acclimatisation
Day 10: High Camp to Summit
Day 11: Descent from High Camp to Vinson Base Camp
Day 12: Travel to Union Glacier
Day 12: Travel to Union Glacier
Day 13: Return to Chile
Best Time To Climb Mount Vinson
Travelling to Antarctica is only really possible between November and March, and climbing Mount Vinson is limited to the period from December to February. This is the summer period, when the days are 24 hours long.
However, the temperatures are far from balmy, and the average temperatures during this time of year are between -12 C and -4C. In early November, temperatures are as low as -30 C and they commonly fall to -40 C during extreme storms.
It is therefore prudent to expect the worst, and pack accordingly. Read our Gear List below to find out what equipment you will need to help you best deal with the extreme cold.
How Difficult Is The Mount Vinson Climb
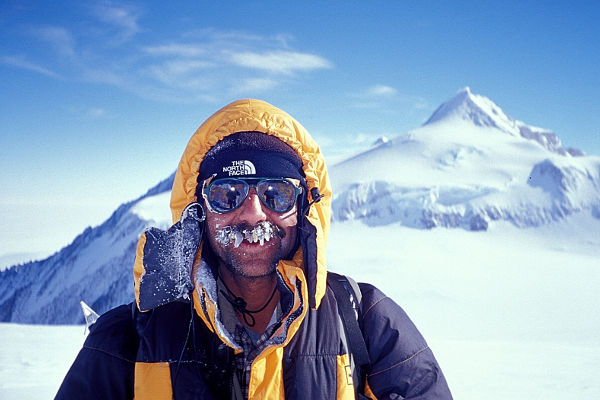
Mount Vinson is rated “extremely strenuous” by mountaineering experts – this adventure is not for the feint-hearted.
The expedition takes place at one of the most remote locations on the planet, with little back-up assistance available in case of emergency.
Climbers can expect to remain at altitudes above 3350m for days on end and the temperatures are known to fall below 40 C during extremely windy storms.
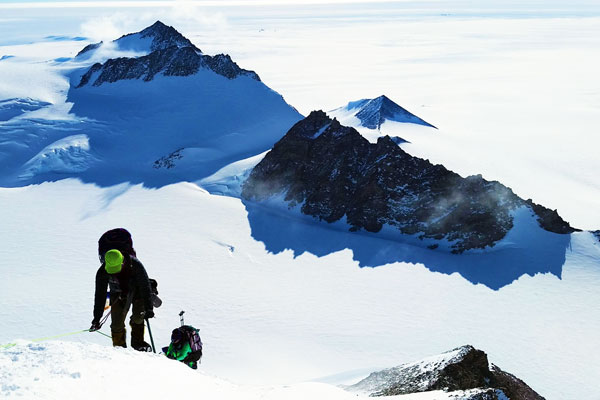
Climbers will be physically active for 8-12 hours per day for 5-9 days, with their heavy load of personal equipment to carry along which weights up to 22 kg each.
Apart from the technical skill physical fitness, and stamina necessary to undertake this task, you will need significant levels of mental strength to come up against the intensity of the journey. You will need to be able to dedicate yourself absolutely to a pre-trip training schedule as well.
Training For The Climb
Climbing Experience Required For Mount Vinson
Tour companies will expect clients to have previous climbing and mountaineering experience. You will have to send in a resume of your previous ascents, and high altitude, cold climates are specifically expected. Experience on mountains like Denali or Mount Logan, as well as winter alpine climbing, ice-climbing and ski touring is recommended.
Some tour companies are willing to evaluate your experience on a case-by case basis, while others have strict rules about the kinds of expeditions that you will need to have completed prior to this journey.
For those of you who do not quite meet the previous experience requirements, it is possible to organize personalized Antarctic-specific training sessions through teams such as Antarctic Logistics. This option is generally recommended for those who have the basic skill set required, but need to hone certain areas of their repertoire.
Mount Vinson Training Excercises
On top of the climbing skills and techniques with which you will need to be familiar, you will need physical strength, endurance, cardiovascular conditioning and high-altitude tolerance. Training like a regular person four to six times a week will simply not be enough to ensure your successful ascent. Even people capable of running marathons might not be in the “right kind” of condition to attempt this summit.
Some of the exercises that we suggest prioritizing in your training are:
- Walking on stairs and up hills carrying heavily-loaded back packs
- Strength training: muscular training for your legs and core. Include weight training and exercises such as lunges, squats, and sit-ups.
- Cardiovascular training: both aerobic and anaerobic training without pack weight is also important. Get your heart rate up.
- Flexibility training: stretching exercises
Most people will need to train for at least 4 months, off a relatively solid baseline of fitness, prior to departure.
During training, the intensity of your work-outs will need to be incrementally raised by about 10% per week in terms of time, elevation gain and distance.
Do not attempt to hasten the training strategy as this will likely only result in injury and under preparation.
Acclimatizing
Altitude Sickness Risk On Mount Vinson
Altitude sickness is a real risk at anywhere above 3,000m elevation above sea level.
The effects include headaches, fatigue and nausea but it can be fatal if left untreated. It is therefore important that trekkers are aware of the danger imposed by climbing at high altitudes, and that they are attuned to its potential symptoms.
Because prior experience of climbing is necessary for those attempting to summit Mount Vinson, it is likely that you will be aware if you suffer particularly from altitude sickness.
Nevertheless, the extent to which people experience this issue is largely unpredictable and cannot be determined by their age, fitness levels or gender.
Avoiding Altitude Sickness
There are some precautions which can be taken to alleviate this risk, however.
Firstly, it is necessary to spend time at the series of base camps to allow your body to adjust to the changing altitude. This extra time will be included in the itinerary planned by the touring company, so for Mount Vinson it is not really necessary for individuals to worry about it.
Drinking plenty of water is also necessary to reduce the chance of feeling the symptoms of altitude sickness and on hiking days it is recommended to drink at least 2 – 3 litres per day.
You should avoid taking any drugs (including sleeping pills), or drinking alcohol, as each of these are known to push those at risk over the edge into a raging head ache.
If you are feeling the effects along the hike, it is important that you communicate this with your guide, as it may be necessary for you to descend slightly to deal with it.
Finally, if you are feeling anxious about altitude sickness, for example if you have experienced it before, consult a doctor before your departure. They will be able to advise you on the best way to tackle the problem and to prescribe a preventative medication.
Mount Vinson Gear Check List
Most of the gear required for climbing Mount Vinson can either be bought or rented. The items on the following list are required unless specifically stated otherwise.
To choose the best gear available today, check out our detailed Gear Reviews & Ranking.
Climbing Equipment
Depending on your operator, you should check what's included in your expedition price.
- Waist leash: to keep your ice axe attached to your body
- Ice axe: Standard mountaineering axe. Choose the size according to your height.
- Accessory Cord/Pre-cut prussiks: 40 ft of 6mm accessory cord for climbing rigging such as prussiking. Pre-tied prussiks will work if you already have them
- Crampons: General mountaineering crampons. Modern steel 12-point crampons with anti-balling agents are recommended. Avoid 10-point, aluminium or single-piece crampons. The traction, and boot-fit is generally superior in the former option.
- Carabiners: 2 large auto-locking carabiners to use with your harness, as well as 6 non-locking carabiners (standard or wiregate will work).
- Alpine climbing harness: make sure your harness fits well over your hiking clothing, includes gear loops, adjustable leg loops and a waist belt. The legs and the waist must be able to fully separate. Newer models of harness which feature a belay loop and do not necessitate “doubling back” your wait belt are recommended for convenience
- Trekking poles: collapsible (preferably 3 sections) skiing or trekking poles with snow baskets
- Ascender: choose one ascender to use in your dominant hand (right or left). Make sure the ascender is not damaged or worn out.
Footwear
- Wool or synthetic socks: three pairs of medium to heavy socks, preferable of merino wool
- Gaiters: full-length waterproof gaiters should fit over your mountaineering boots. Avoid short trekking gaiters as these provide inadequate coverage
- High-altitude double boot: double boot with hard plastic or soft synthetic outer to use with a high-altitude liner. Not required if you are using a high-altitude, all-in-one boot
- Insulated overboots: under-the-knee neoprene overboots. Fit should be tight over your boots and be suited to your crampons. Not required if you are using a high-altitude, all-in-one boot
- High-altitude all-in-one boot: option instead or the high-altitude double-boot, this integrated system can be used without overboots or gaiters
- Booties: Synthetic or down camp snow booties for comfort
Handwear and Headwear
- Lightweight liner gloves: wool or synthetic gloves with a comfortable fit. Light colours offer better UV protection
- Softshell gloves: Midweight gloves to use when mittens are too warm. Ideally choose a model fitted with a robust leather palm
- Insulated shell gloves: One pair of shelled gloves containing removable liners. Look for models with a durable leather palm.
- Expedition mittens: Expedition-rated mittens are the warmest model offered by any manufacturer.
- Neck warmer: A UV neck gater is really useful for a wide range of functions. Replaces the need for a bandana and can be used as a scarf, balaclava or hair-holding device.
- Sunhat: Any foldable, protective sunhat is appropriate.
- Balaclava system: Two full balaclavas are important. One that is lightweight and the other heavyweight. Important in addition to the buff.
- Ski hat: Wool or synthetic beanie that covers ears and head
- Face mask: If your balaclava does not have an in-built face mask, you will need to buy one separately. Neoprene models are suitable – make sure it fits you snugly before bringing it along
- Glacier glasses: Glacier glasses with full protection around eyes and across nose is necessary.
- Ski goggles: High-quality goggles for protection from the wind and sun. Visible light transmittion (VLT) should be no more than 30 %. Photochromic models are particularly helpful.
- Nose guard: optional but useful to use instead of constant sunblock application.
Technical clothing
- Short underwear: two to three pairs. Synthetic or wool only – avoid cotton! Make sure the style of underwear is comfortable
- Baselayer bottom: Non-cotton baselayer with a good fit. We recommend merino wool.
- Heavy baselayer bottoms: Heavy baselayer bottoms that are specifically designed for climbing expeditions in extreme cold conditions. Fabrics such as Polartec Power Strech, Capilene 4 and Polartec Power Dry are suitable.
- Baselayer top: One or two non-cotton, long-sleeved base layer shirts. Merino wool recommended. Light coloured, hooded baselayers help with sun protection.
- Midlayer top: A form-fitting, midweight fleece layer to wear over baselayers. We recommend a hood on this layer
- Softshell trousers: comfortable, uninsulated trousers that should be able to fir over your baselayer bottoms easily, and fit well without the baselayer too. Avoid “zip-off” style trekking trousers, which are generally too light
- Softshell jacket: A breathable, wind-and-weather proof softshell jacket is critical to your layering. A hood is suggested. Must fit snuggly over the mid and base layers
- Lightweight insulated jacket: an insulated jacked filled with down or synthetic insulation is vital
- Expedition down parka: 8000-meter rated. Must be in perfect condition, fully baffled and recently cleaned with Nikwax Down Wash for optimal loft. We advise that you consult with your touring company your parka choice as this item is such a critical item.
- Insulated trousers: Insulated trousers with full-length side-zips. Avoid ski trousers and one-piece suits.
Personal Equipment
- Expedition climbing pack: 75 -105 L climbing pack with internal frame. If you opt for a smaller pack make sure you know how to pack your gear very effectively
- -40 Down sleeping bag: Should be rated as -40 degrees sleeping bag. The fabric must be down and not synthetic, as synthetic options of this grade are far too bulky
- Foam pad: ¾ or body length foam pad is needed. Closed cell foam or specifically designed pads both work
- Inflatable sleeping pad: Full length, ultralight inflatable pad recommended. Bring a valve repair/body patch kit in case of puncture
- Water bottle parkas: two insulated water bottle parkers with zipped opening. Neoprene is not recommended as it does not provide enough insulation
- Spoon, knife, mug and bowl: Durable, hard plastic. Longer spoon and knife stems helpful for eating with gloves of. Mug should be insulated. Collapsible bowl will work.
- Water bottle: two or three one litre bottles. BPA free. No water bag or bladder which freeze over too easily.
- Pee bottle (and funnel for women): 1- 1.5 L capacity with a wide mouth, clearly marked.
- Rubbish contractor bags: three bags for waterproofing pack. Can use a waterproof pack liner.
- Small Duffel bag: to store any items you are not bringing on the mountain. 40-50L capacity. Pack a travel lock in case.
- Expedition Duffel bag: 150 L expedition duffel bag for all gear
- Toiletry bag: containing toilet paper, hand sanitiser, toothpaste, floss and wet wipes.
- Sunblock: SPF 30+ and Lipscreen (SPF 30+).
- Small First Aid kit: containing basic painkillers, Moleskin, tape and antiseptic wipes
- Personal medication
- Hand and toe warmers: bring 3 sets of each.
- Food: contact your expedition provider to decide what food to bring. This requires a little research
- Travel clothes
Mount Vinson Climb Permits & Costs
There are no permits required for the Mount Vinson expedition as of yet, but the cost of the overall trip is steep. The price is mostly due to the logistics of getting to Antarctica and the cost of maintaining the Base Camps in such a remote location.
The costs of the Mount Vinson expedition ranges from $50,000 to $55,000.
Generally, in this price the following is included:
- Airport transfers while in Punta Arenas, Chile
- Flights from Punta Arenas to Antarctica and back
- Flights from Union Glacier to Vinson Base Camp and back
- Meals and tents in Antarctica
- Group climbing and camping equipment
- Speciality guide
- The celebration dinner back at Mount Vinson Base Camp
Frequently Asked Questions about Mount Vinson
Is climbing Mount Vinson dangerous?
Of course. Remarkably though, there have been no deaths on the mountain. However, there have been serious cases of frostbite, and the risk of climbing remain significant even with the optimistic statistics.
Most importantly, the remoteness of the location means that serious medical attention could be many days away. This factor contributes significantly to the risk of the climb.
Do I need a Guide to Climb Mount Vinson?
Mostly, yes. If you are dead-set on climbing without a trained guide, you will still need to go with at least 3 other climbers with serious experience. This is not to mention all the logistics of getting to and from the mountain in Antarctica.
How long does it take to climb Mount Vinson?
It takes between 5 and 9 days to climb Mount Vinson. You should expect to climb for about 8 to 12 hours per day. Summit day is the longest day of the climb involving an 8 hour ascent and 3 - 5 hour descent.

Hi and thanks for a very informative page about mt Vinson. One question: Can you reccomend a company in the pricerang of 30.000 USD? All the one I find starts at 50.000USD
Greetings André Spica
Hi Andre, prices have changed quite a bit since pre-Covid when this article was written. Prices are now between $50-$55k depending on who you go with.
Hello,
I'm interested in climbing Mount Vinson.
Safiyyah Ali inspired me to climb Mt. Kilimanjaro in 2018. It's been a dream of mine to visit Antarctica ( My goal is to be the first Indo Canadian Trinidadian female to hit all 7 continents and 3 mountains).
I've climbed/hiked: Mt. Tomaree, Grouse Mountain, and Mt. Kilimanjaro.
I have no fear of the challenge.
I'd like to make Mt. Vinson my next next successful climb at age 52.
It's costly, but I'm going to appeal for sponsorships..
I am thinking about climbing Vinson Massif.What will be the rate of climb to the summit?
How many summit attacks are possible on the tour?
I would like to use a tent by myself, is this possible?
We look forward to hearing from you.
Thanks,
Tai
Hi Tai, the answers to these questions vary by operator, but most Vinson climbs last around 7-9 days, with pre and post days taking the total trip to around 13-14 days. Usually there is just one summit attempt.